BUILDING EARL • INTERIOR PREP
The Ugly Part Comes First: Stripping Earl's Interior
The glamorous part can wait. Right now, Earl needs prep.
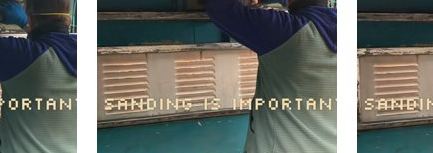
There is a point in every build where the fun ideas have to get out of the way and the ugly work has to start.
That is where Earl is right now.
A lot of this project has involved planning the systems that will eventually go inside him: the service window, power, water, ice, E-track, Unistrut, lighting, drainage, and all the modular pieces that will eventually make Earl useful.
But none of that goes in until the old interior is ready for it.
Right now, that means sanding, scraping, grinding, wire wheels, old paint, surface rust, dust, and a whole lot of repetitive work.
It is not the glamorous part of the build.
It is the part that makes the glamorous part possible.
Figuring Out What Actually Works
Today turned into a little tool experiment.
I got an oscillating multi-tool from Amazon and put it to work on Earl's interior.
We started with the sanding attachment.
It worked, but it was slow.
Then we switched to a more aggressive half-moon blade and started scraping at the old paint and buildup.
That worked better.
But I was still looking at a lot of steel and thinking there had to be a faster way.
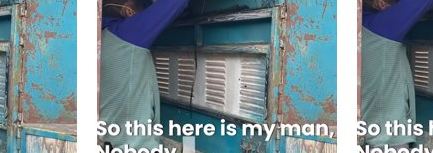
So I made a Harbor Freight run and picked up a wire wheel for the angle grinder.
That changed everything.
I did not get video of the wire wheel in action yet, but so far it is by far the best tool I have used for removing the old paint.
The oscillating tool still has a place, especially around seams, corners, tight spots, and areas where I want more control.
But for the broad steel surfaces, the wire wheel on the angle grinder is clearly winning.
That is probably going to happen a lot during this build.
I can plan all I want, but sometimes the only way to figure out the best method is to try something, decide it is too slow, try something more aggressive, and eventually find the tool that actually makes sense.
The Real Enemy Is Underneath the Paint
The biggest hurdle so far is not the top layer of paint.
It is what is underneath it.
There is a thick undercoat buried several layers down that I am pretty sure is Earl's original primer, and that stuff is a sumbitch to get through.
The newer paint comes off.
The surface rust comes off.
The loose material comes off.
Then you hit that old undercoat and progress slows way down.
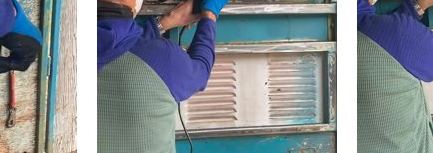
It is thick, stubborn, and apparently determined to remain part of Earl forever.
That coating has become the biggest obstacle in this stage of the build.
And unfortunately, this is one of those jobs where cutting corners now can create a lot more work later.
The better the prep, the fewer problems I should have with the new paint.
If I leave loose material, poorly bonded coatings, rust, or contaminated surfaces underneath, I am just creating future peeling, bubbling, adhesion problems, and touch-up work.
There is no point putting expensive paint over a bad foundation.
Getting Down to Something I Can Trust
Earl has decades of history inside him.
Old paint.
Surface corrosion.
Scratches.
Oxidation.
Layers of grime and wear from being an actual working horse trailer before I ever got my hands on him.
I am not trying to make every piece of steel look brand new.
That is not really the point.
The goal is to remove what is loose, unstable, rusty, poorly bonded, or likely to interfere with the next stage.
Before I prime anything, paint anything, mount anything, or start installing new systems, I want to know what I am actually working with.
Surface prep sounds boring until you realize everything after it depends on it.
Building Earl in the Right Order
One thing I am trying to be disciplined about with this project is doing things in the right order.
It would be a lot more fun to start installing shelves, counters, lighting, beverage equipment, or anything else that makes Earl look finished.
It would also be dumb.
The sequence needs to make sense.
Clean it. Inspect it. Repair it. Protect it. Prime it. Paint it. Then build on it.
That order is not flashy, but it is how Earl ends up being something I can actually rely on.
The Videos Are Becoming Part of the Build
I have been documenting the work as I go, and there are now several TikTok videos showing different parts of the process.
The encouraging thing is that they are starting to get a few hundred organic views within the first few hours after posting.
That is not internet fame.
But for a new account about an old horse trailer, I will take it.
More importantly, the videos are becoming a running record of the build.
Instead of waiting until Earl is finished and pretending the whole thing happened cleanly and according to plan, people can see the project while it is still dirty, awkward, unfinished, and occasionally ridiculous.
Some days will show obvious progress.
Some days will show me trying three different tools before figuring out which one actually works.
Both are part of the build.
Not Every Day Is a Big Reveal
Some days on Earl are going to produce obvious milestones.
New wheels.
A finished service window.
Fresh flooring.
Lights turning on for the first time.
A completed Hydration Station module.
Other days are going to be me standing inside an old horse trailer trying to beat decades-old primer into submission with a wire wheel.
Those days count too.
Actually, those days may count more.
Because the flashy parts only work if the boring parts were done correctly first.
What Comes Next
This phase is going to continue until the interior steel is cleaned up enough for the next step.
From there, I can move into inspection, corrosion protection, primer, and eventually the interior finish.
Then the more interesting systems can start going back in.
E-track.
Unistrut.
Electrical.
Lighting.
Water.
Service equipment.
Modular mounting points.
All the things that eventually turn Earl from an old horse trailer into a working event platform.
For now, though, the job is simple:
Keep stripping. Keep cleaning. Keep finding solid steel underneath the ugly stuff. And keep moving Earl forward.
HELP BUILD EARL
Want to help move the next stage forward?
The GoFundMe is helping pay for the actual tools, materials, safety work, and equipment that turn Earl from an old horse trailer into a working event platform.
Help Build Earl on GoFundMe Back to earlthetrailer.com